Step 1: Remove the old number plates
Unscrew the existing number plate if it is secured with screws.
If it is secured with adhesive sticky pads, gently pull the plates away from the car.
Step 2: Clean the mounting area
Use a damp cloth with warm soapy water to remove any dirt, dust or adhesive residue.
Ensure the surface is completely dry before attaching the new plate.
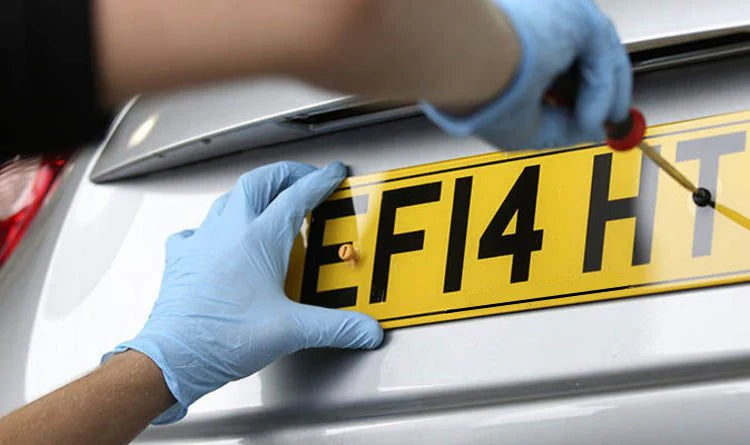
Step 3: Attach with screws (drill method)
Hold the new number plate in position to check the alignment using a spirit level.
Carefully, drill through the number plate in the place where the screws will align to the car (DO NOT DRILL THROUGH ANY GEL OR 4D LETTERS).
Insert the screws and tighten them until the plate is secure. Be careful not to overtighten them as it may crack the acrylic.
Step 4: Using adhesive sticky pads (no-drill method)
If you prefer a cleaner installation (recommended for gel and 4D number plates) apply strong double sided adhesive pads to the back of the number plate.
TOP TIP - Use a hair dryer or something similar to heat and activate the glue, making them extra strong when fixing your plate.
Firmly press the plate onto the cleaned surface, holding it in place for a few seconds to ensure proper adhesion.
Allow the adhesive to set for a few hours before driving.